
Beverly Hills Cop 1 : My creation of Axel Foley
Sweater/Torso:
First I started off my remix project by creating the torso of Axel Foley. I thought that I wouldn't have enough time to create both a full body and the outfit so I combined the two. I started off by setting up the modifiers: Mirror, Subdivision Surface and Solidify (which in the end was a mistake to use as it created an overwhelming amount of polys). Using these I outlined the torso by wrapping down the middle of the chest, around the waist, up the centre of the back then finished it off by creating the neckline. After this was done I filled in the blank areas to get the general look of Axel Foley’s sweater he always wears. This was very difficult as it was my first time creating this much clothing/attire for a human model in this style so to get what my outcome was i'm very satisfied with it. I finished this area out with some half sleeves to stay true to my source material and this helped me so I could experiment more with human arms and hands as experience for future projects.


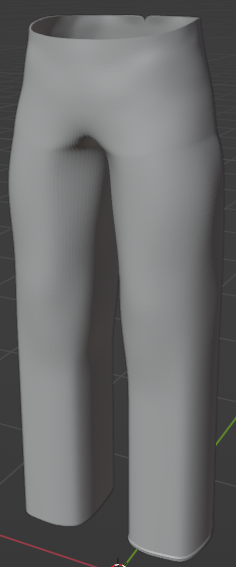
Jeans/Trousers:
After the sweater was complete I moved on to the trousers Axel wears throughout the movie which is a pair of flared blue jeans which he also wears throughout the entire film. These were more troubling to make as I needed to get a neat fold around the centre of the jeans that separate each leg, a similar way to the sweater was used here as I started by creating the waistline. then i mapped out the groin then down the side off the leg to the cuffs. Now with an outline of the jeans I was able to fill in the missing sections and I tried to vary the width going down the leg to give a folded feel and give a more simplistic yet realistic look.


Socks/Ankles:
Once the trousers were finished I decided to do socks to connect the shoes and trousers of the model together which was the most simple area of my model. It is also the only area of the model that doesn't use any modifiers, because the flared trouser legs obscure your view of them so I thought this area can be very simple and not that detailed. Which led to me using one cylinder that I started off by extruding upwards while scaling each time to give a change of width to the sock and I did this till it entered the trouser leg, where I could then cut the empty space with a simple plane.

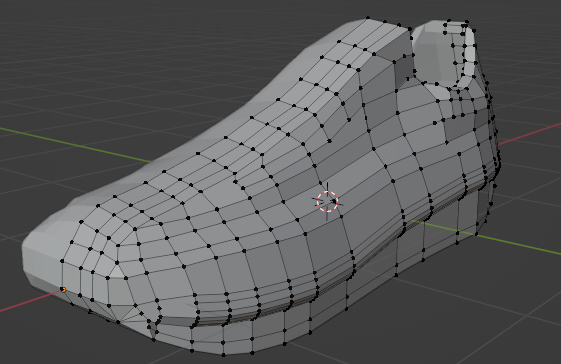
Shoes/Trainers:
Next up was the shoes which are a pair of Adidas trainers, I used a reference image to help which was an image of the pair Axel wears and to get a more 3D aspect I used my own pair of Adidas trainers. I built this from the bottom up with the soles first as it's the whole base of what a shoe is and it gives me the best outline I could have of the trainers and this was where I had to use my own shoe as images from above dont give a clear view of the soles shape. Onto the proper area of the shoe, with this i created a curve to give the illusion of a foot being inside and to make the shoe look women out. I tried to make the top where the laces tie up quite long but in the end it looked a little stubby for my liking and it felt wrong. I could possibly have made it less tall to make it somewhat proportional. Anyway when I had a solid formation of the sides I made the foot hole so the socks could fit in and make it seem whole.


Arms:
The final area of construction of the model was the arms, as time was too short by this point to create a head. This was by far the trickiest and most time consuming bit as I have never created an arm before as I mostly do props/armour so I had to be more intricate and careful doing this area, because it's one of the only bits that show skin. Like previous areas of this project I did an outline first to get a good foundation to lower the difficulty of the arm which it did. I had created the up of the arm first down to the top of the hand, from here I created the wrist and an upper arm ring so I could make a shrinking curve down towards the hand as Axel’s wrists are smaller than the upper arm. Next was the hand. This was where it got difficult as I had to leave holes for the fingers to be made and I did this by extruding the vertices in places where fingers make the most sense and creating circles where I would extrude into the fingers. However the fingers do have a few little creases in the mesh which are both a pro and con as the style i was going for the project was early 00’s so those creases give that rough feel to the model but it works against me when texturing gets involved, as it becomes a bit unpredictable. Also if i got to rigging it may have also created problems with those polys stretching and clipping through one another.


Head:
I managed to complete half of the head before time had ran out of time. However I started off doing the base of the neck then went over the top to give myself a frame for a head so the process of creating the curves would be easier and to get good proportions. I then started to build up the base gradually getting smaller as it is the neck and before my time had ran out I manged to get the whole neck complete.


Texturing:
Towards the end of the project I attempted to add textures to the model and it turned out horribly this might be due to the solidify modifier I referred to before creating unnecessary polys. This made it difficult when unwrapping in the UV Editor as I couldn't get clean seams when transitioning down each part so it looks sloppy and very rough. If i had more time i would definitely go back and try to remove unnecessary polys, get more high quality textures and create more seams so that i can get more precise maps for texturing.


Full body throughout project:


